TensorFlow Hub 模型複用(Jinpeng)
在軟體開發中,我們經常複用開源軟體或開源函式庫,避免相同功能的程式碼重複開發,減少了大量的重複勞動,也有效縮短了軟體開發周期。程式碼複用,對軟體產業的發展,有著極大的幫助。
相對的,TF Hub 目的是為了更好的複用已訓練好且經過充分驗證的模型,可節省大量的訓練時間和計算資源。這些預訓練好的模型,可以進行直接部署,也可以進行遷移學習(Transfer Learning)。對獨立開發者來說,TF Hub 是非常有意義的,他們可以快速複用像谷歌這樣的大公司使用大量計算資源訓練的模型,而他們個人去蒐集這些資源是很不實際的。
TF Hub 網站
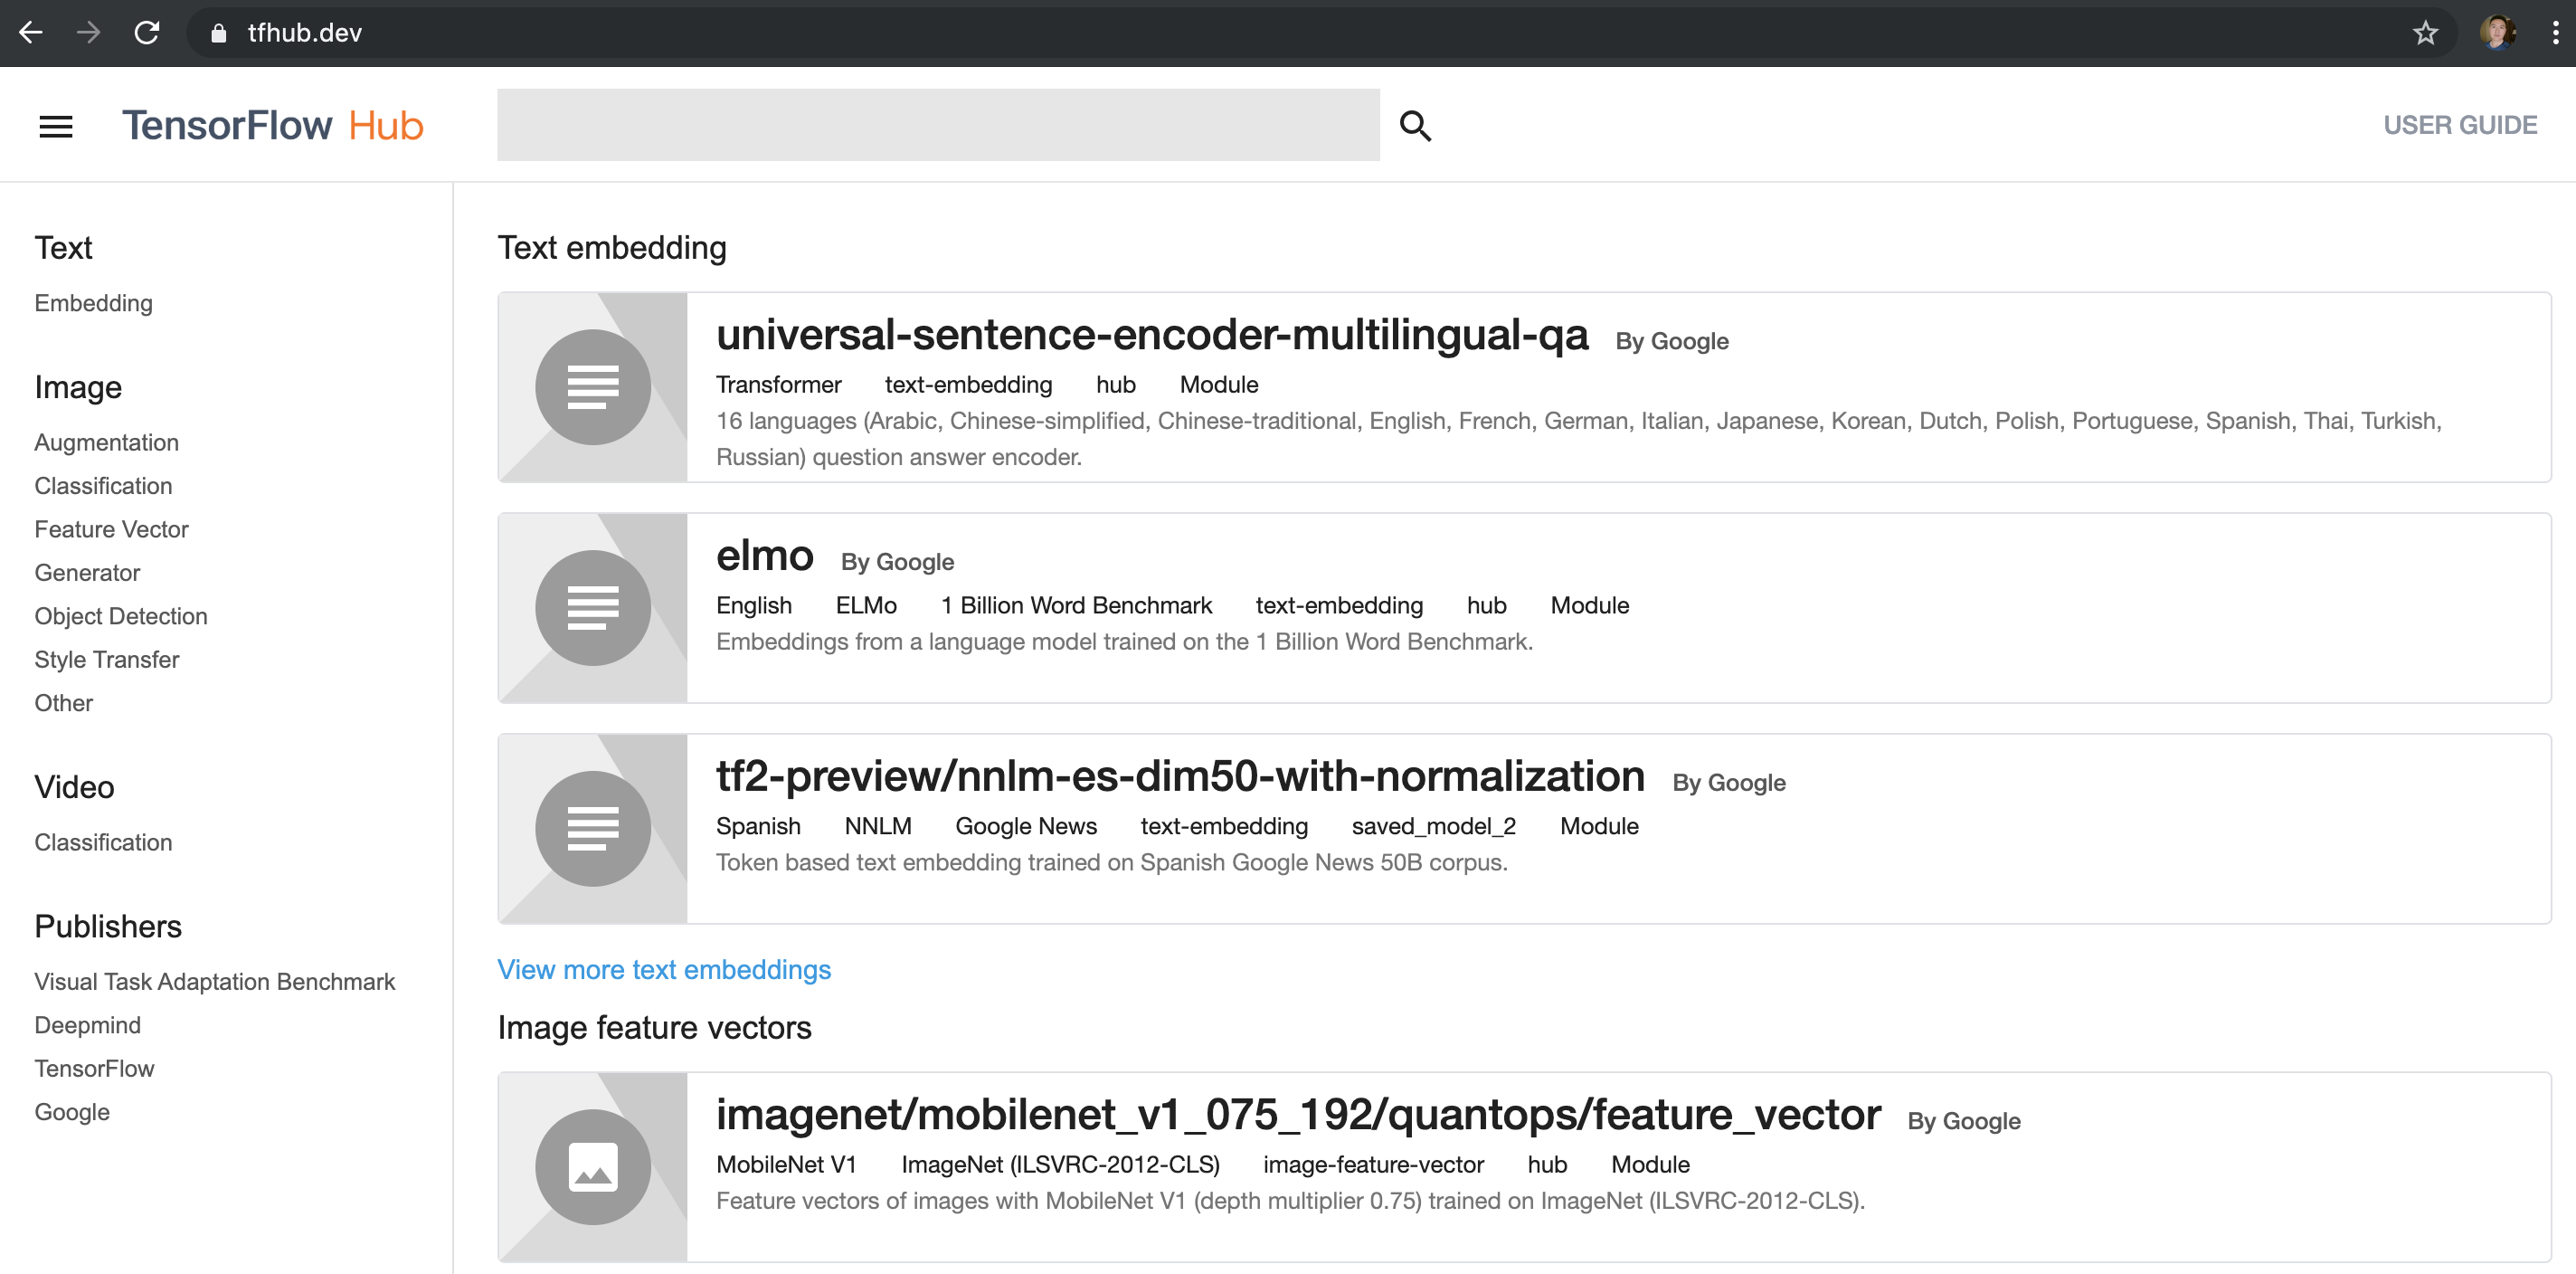
打開首頁 https://tfhub.dev/ ,在左側有 Text、Image、Video 和 Publishers 等選項,可以選取需要的類別,然後在上面的搜尋框輸入關鍵字,即可找到相對應的模型。
以 stylization 爲例,我們找到以下模型:
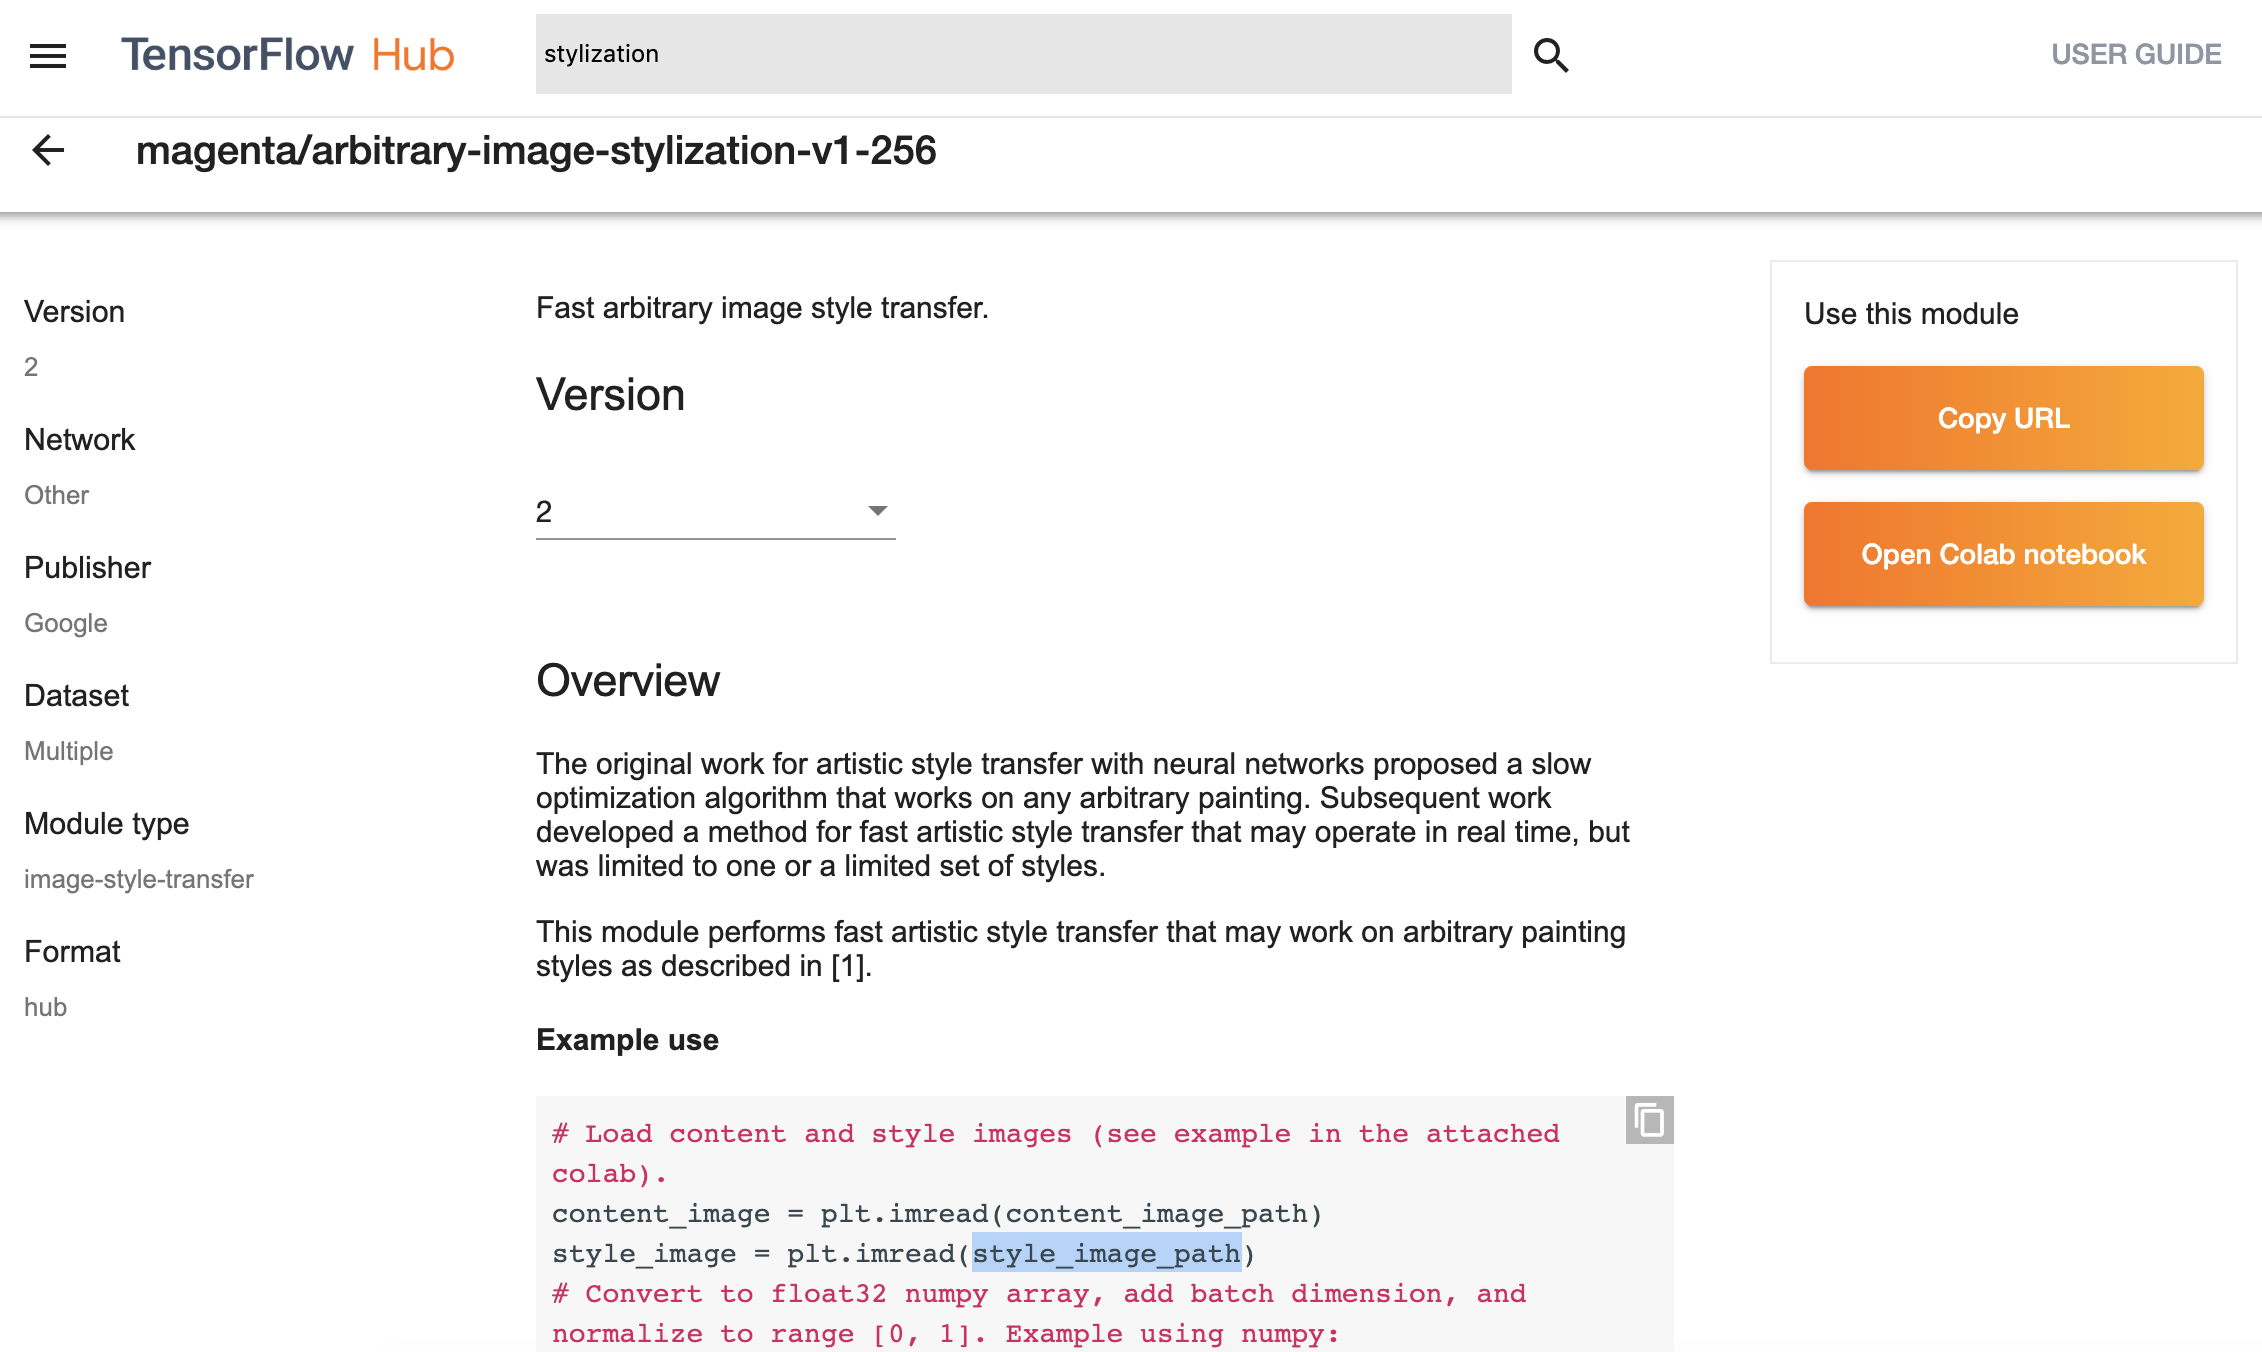
模型的網址如下:
https://tfhub.dev/google/magenta/arbitrary-image-stylization-v1-256/2
其中,結尾的 2 為該模型的版本號碼。
提示
由於目前還有很多模型是基於 TF1.0 的,所以選擇的過程中請注意,有些模型會明確寫出來是用哪個版本,或者檢查使用是否是 tfhub 0.5.0 或以上版本的 API
hub.load(url),之前版本使用的是hub.Module(url)。
TF Hub 安裝
TF Hub 是單獨的一個函式庫,需要單獨安裝,安裝指令如下:
pip install tensorflow-hub
提示
在 TF2.0 上,必須使用 0.5.0 或以上版本,因為接口有變動。
TF Hub 模型使用案例
TF Hub 模型的複用非常簡單,程式碼如下:
import tensorflow_hub as hub

hub_handle = 'https://tfhub.dev/google/magenta/arbitrary-image-stylization-v1-256/2'
hub_model = hub.load(hub_handle)
outputs = hub_model(inputs)
根據 stylization 模型的參考程式碼和 notebook,進行了精簡和修改,實作出圖像的風格轉換功能。
import matplotlib.pyplot as plt
import numpy as np
import tensorflow as tf
import tensorflow_hub as hub

def crop_center(image):
    """Returns a cropped square image."""
    shape = image.shape
    new_shape = min(shape[1], shape[2])
    offset_y = max(shape[1] - shape[2], 0) // 2
    offset_x = max(shape[2] - shape[1], 0) // 2
    image = tf.image.crop_to_bounding_box(image, offset_y, offset_x, new_shape, new_shape)
    return image

def load_image_local(image_path, image_size=(512, 512), preserve_aspect_ratio=True):
    """Loads and preprocesses images."""
    # Load and convert to float32 numpy array, add batch dimension, and normalize to range [0, 1].
    img = plt.imread(image_path).astype(np.float32)[np.newaxis, ...]
    if img.max() > 1.0:
        img = img / 255.
    if len(img.shape) == 3:
        img = tf.stack([img, img, img], axis=-1)
    img = crop_center(img)
    img = tf.image.resize(img, image_size, preserve_aspect_ratio=True)
    return img

def show_image(image, title, save=False, fig_dpi=300):
    plt.imshow(image, aspect='equal')
    plt.axis('off')
    if save:
        plt.savefig(title + '.png', bbox_inches='tight', dpi=fig_dpi,pad_inches=0.0)
    else:
        plt.show()

content_image_path = "images/contentimg.jpeg"
style_image_path = "images/styleimg.jpeg"

content_image = load_image_local(content_image_path)
style_image = load_image_local(style_image_path)

show_image(content_image[0], "Content Image")
show_image(style_image[0], "Style Image")

# Load image stylization module.
hub_module = hub.load('https://tfhub.dev/google/magenta/arbitrary-image-stylization-v1-256/2');

# Stylize image.
outputs = hub_module(tf.constant(content_image), tf.constant(style_image))
stylized_image = outputs[0]

show_image(stylized_image[0], "Stylized Image", True)
其中, hub.load(url) 就是把 TF Hub 的模型從網路下載和載入進來, hub_module 就是運行模型, outputs 即為輸出。
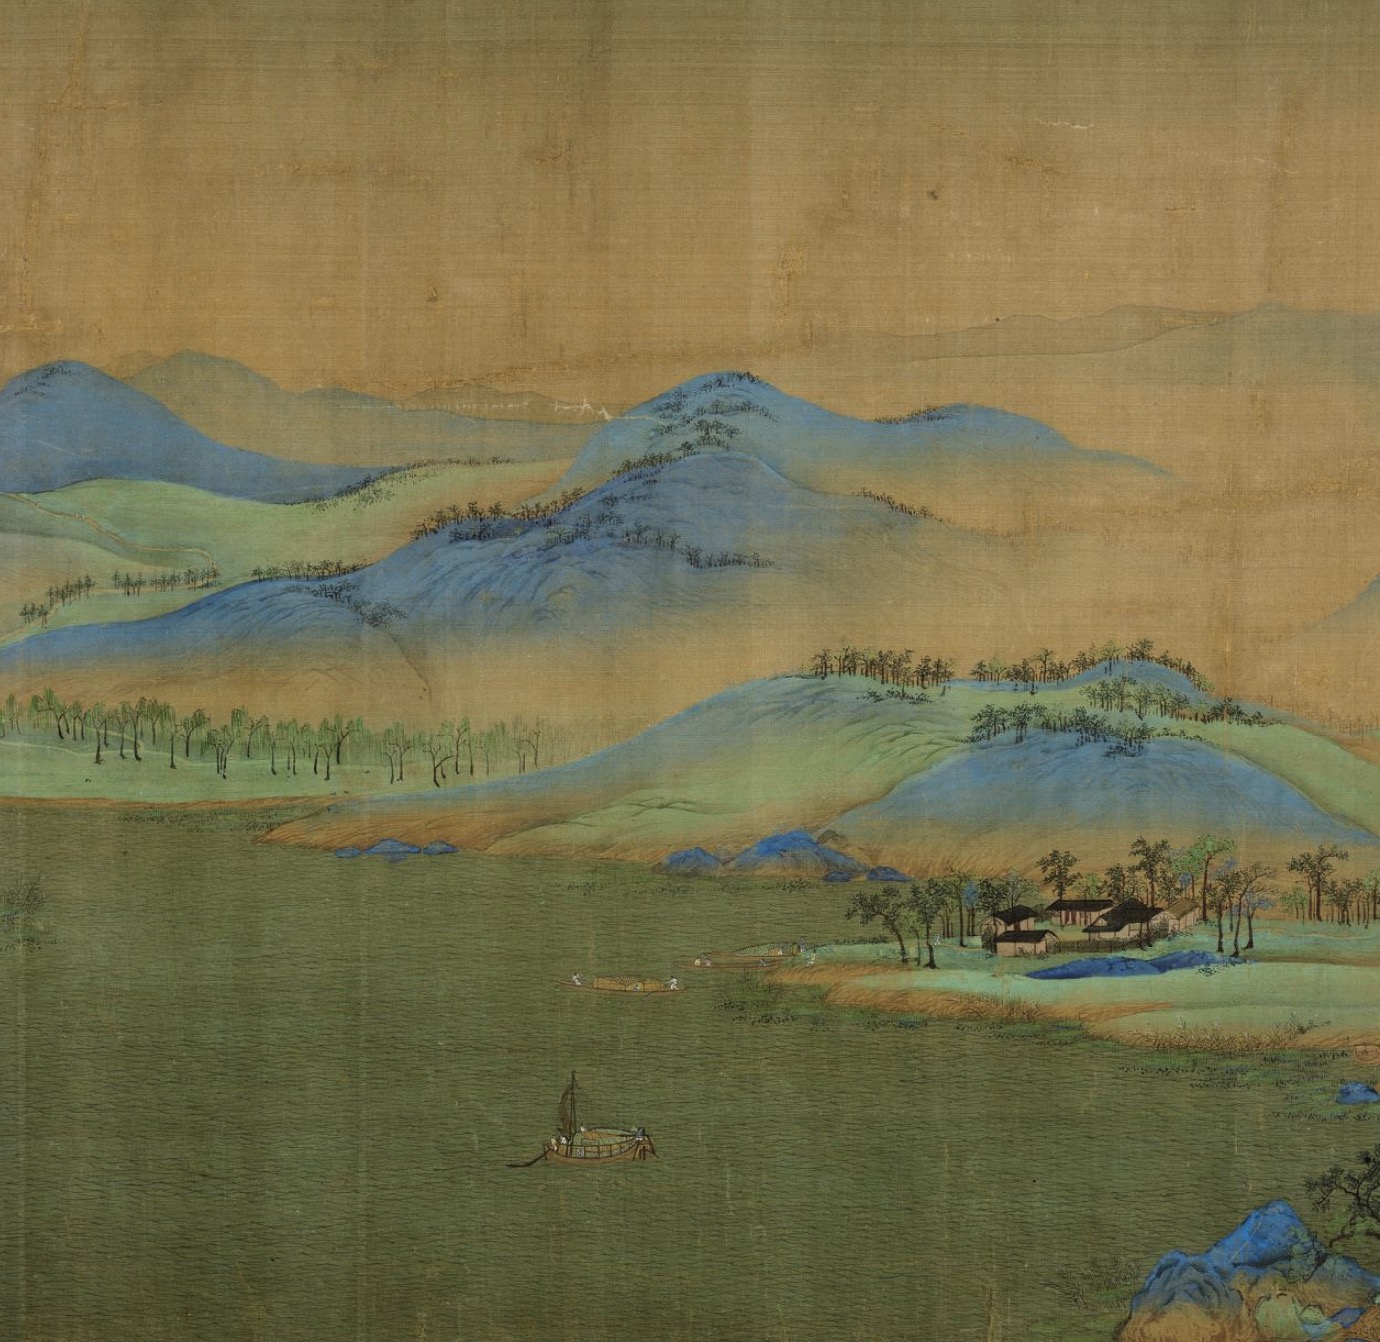
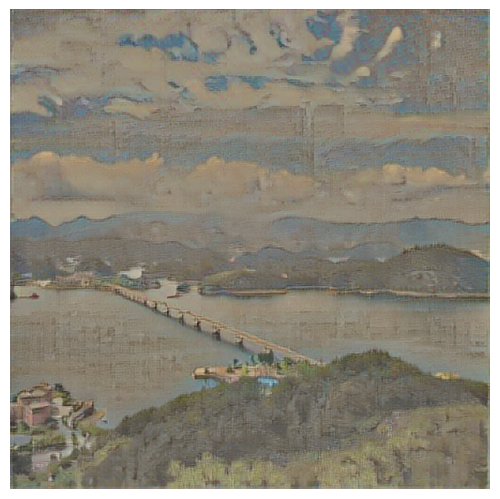
上面的程式碼,輸入的圖像是一張筆者拍的風景照片,風格圖片是故宮館藏的《王希孟千裡江山圖卷》部分截圖。
輸入圖片:

風格圖片:
輸出圖片:
大家可以在如下路徑獲取 notebook 和程式碼體驗:
https://github.com/snowkylin/tensorflow-handbook/tree/master/source/_static/code/zh/tfhub
也可在谷歌提供的如下notebook體驗:
TF Hub 模型 Retrain 範例
相信預預訓練的模型不一定能滿足開發者的實際需求,還需要進行二次訓練。針對這種情況,TF Hub 提供了很方便的 Keras 接口 hub.KerasLayer(url) ,可以封裝在 Keras 的 Sequential 層狀結構中,進而針對開發者的需求和資料進行再訓練。
我們以 inception_v3 的模型為例,簡單介紹 ``hub.KerasLayer(url)``使用的方法:
import tensorflow as tf
import tensorflow_hub as hub

num_classes = 10

# 使用 hub.KerasLayer 組件待訓練模型
new_model = tf.keras.Sequential([
    hub.KerasLayer("https://tfhub.dev/google/tf2-preview/inception_v3/feature_vector/4", output_shape=[2048], trainable=False),
    tf.keras.layers.Dense(num_classes, activation='softmax')
])
new_model.build([None, 299, 299, 3])

# 輸出模型結構
new_model.summary()
執行以上程式碼輸出結果如下,其中 keras_layer (KerasLayer) 就是從 TF Hub 上獲取的模型。
Model: "sequential"
_________________________________________________________________
Layer (type)                 Output Shape              Param #
=================================================================
keras_layer (KerasLayer)     multiple                  21802784
_________________________________________________________________
dense (Dense)                multiple                  20490
=================================================================
Total params: 21,823,274
Trainable params: 20,490
Non-trainable params: 21,802,784
_________________________________________________________________
剩下的訓練和模型保存跟正常的 Keras 的 Sequential 模型完全一樣。
可在谷歌提供的如下 notebook 體驗: